The Most Magical Easter Sweet Treats You Can Make in Under 30 Minutes
What if you could wow your family this holiday season without spending hours in the kitchen? These easter sweet treats are the answer every busy home baker has been waiting for. Whether you are hosting a big Easter brunch or simply want something festive and fun to share with the kids, this quick and easy recipe delivers spectacular results with minimal effort. Easter is one of those special holidays where colorful, cheerful desserts take center stage, and today we are sharing a recipe that brings joy to every bite. Get ready to discover how simple ingredients can transform into something truly magical.
Why Making Easter Sweet Treats at Home Is Totally Worth It
Store-bought holiday sweets are convenient, but nothing compares to the warmth and personal touch of homemade treats. When you create these festive goodies from scratch, you control the ingredients, the sweetness level, and the decorations. Homemade Easter desserts also make wonderful gifts, table centerpieces, and activities to enjoy with children. The process itself becomes part of the holiday memory. Beyond that, making sweets at home is surprisingly budget-friendly, especially when you use pantry staples you already have on hand. You will save money, impress your guests, and have a genuinely fun experience in the kitchen this spring season.
When mornings are busy, quick meals can make a huge difference. If you need more inspiration, check out these Quick Breakfast Recipes or try these Healthy Breakfast Ideas that are perfect for a balanced start to your day.
Table of Contents
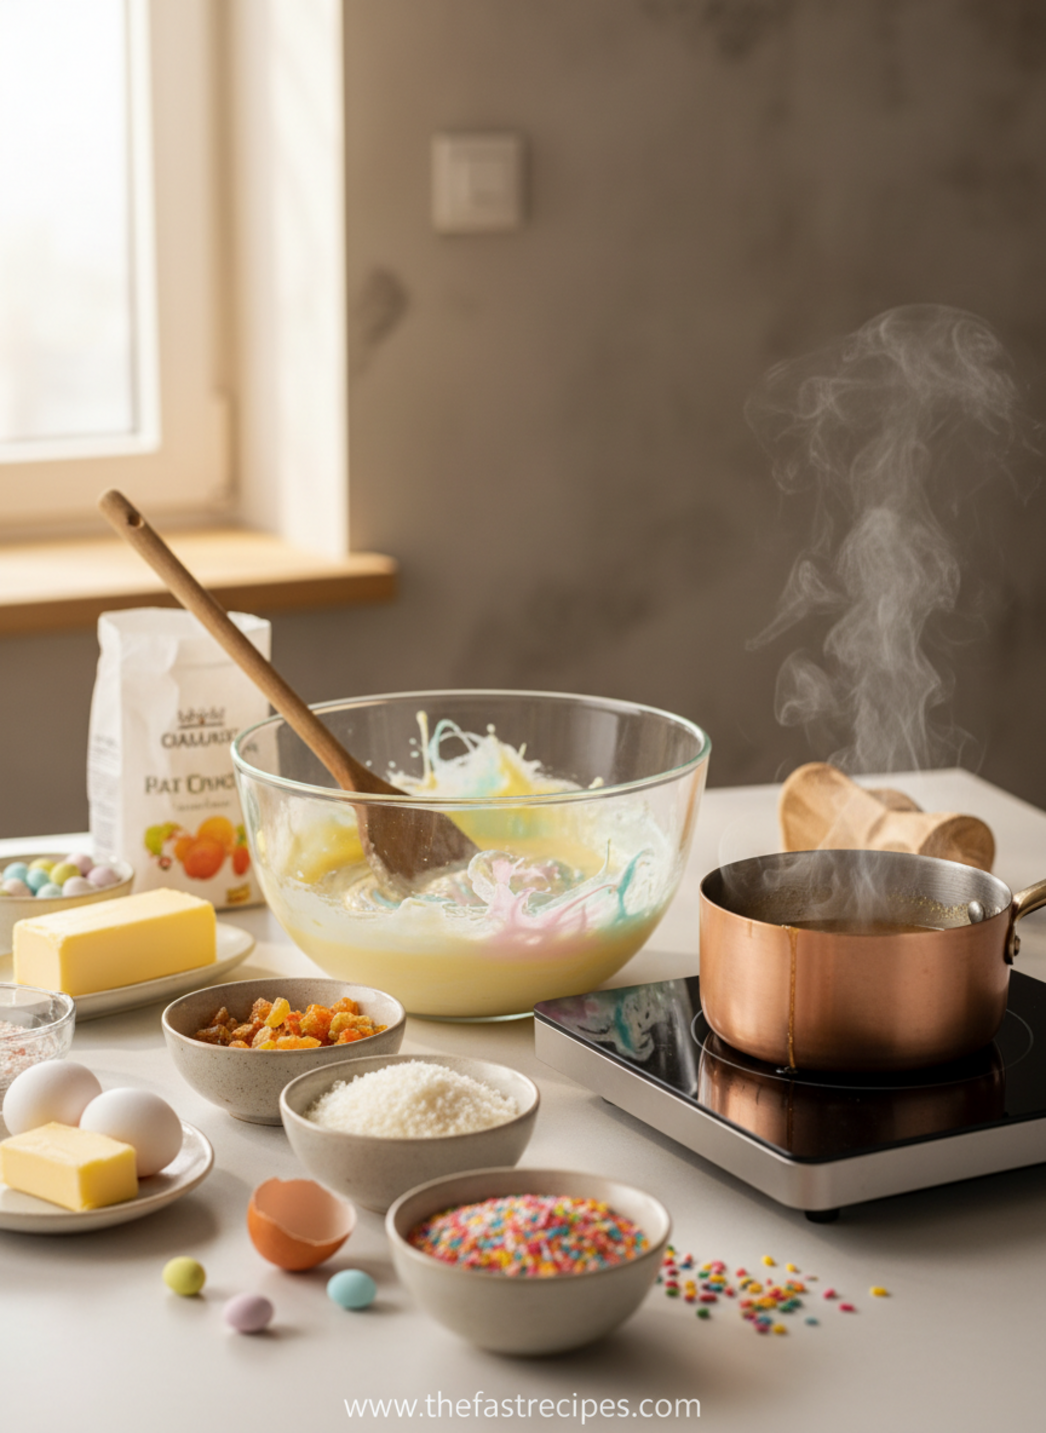
Ingredients and Equipment
Before you start, gather everything you need so the process flows smoothly from start to finish.
- 2 cups white chocolate chips or melting wafers
- 1 cup Rice Krispies cereal
- 1 cup mini marshmallows
- 1 tablespoon unsalted butter
- Pastel food coloring (pink, yellow, lavender, mint green)
- Easter-themed sprinkles or edible glitter
- Mini candy-coated chocolate eggs (like Cadbury mini eggs)
- Easter paper cups or silicone molds
- Optional: shredded coconut dyed green for a grass effect
- Optional: peanut butter for added flavor and richness
Equipment needed:
- Large microwave-safe mixing bowl
- Silicone spatula
- Baking sheet lined with parchment paper
- Small saucepan (optional if melting on stovetop)
- Measuring cups and spoons
- Muffin tin or cupcake liners
Substitutions: You can swap white chocolate for dark or milk chocolate. Use dairy-free butter and vegan chocolate chips to make this recipe completely plant-based. If you do not have Rice Krispies, crushed graham crackers or cornflakes work beautifully as a crispy base alternative.
| Best Kitchen Tools for This Recipe |
| Rachael Ray Cucina Nonstick Cookware Set (12-Piece) |
| 10-in-1 vegetable chopper |
| Ninja NeverClog Cold Press Juicer |
| Instant read meat thermometer |
| Oil sprayer for cooking |
Prep and Cook Time

| Related Recipes |
| Greek Yogurt Recipes |
| Delicious Banana Foster Pancakes |
| Quick & Easy Keto Smoothies for Busy Mornings |
This recipe is designed for busy people who want stunning results without sacrificing their entire afternoon.
- Prep Time: 10 minutes
- Cook Time: 5 minutes (melting chocolate)
- Setting Time: 15 minutes in the refrigerator
- Total Time: 30 minutes
- Yield: Approximately 12 festive Easter cups
With only 30 minutes from start to finish, this is truly one of the fastest and most rewarding holiday dessert projects you will ever attempt. The setting time does most of the work while you relax and enjoy the holiday spirit.
Step-by-Step Instructions
Follow these simple steps to create your gorgeous easter sweet treats with confidence and ease
- Line your baking sheet with parchment paper and set out your cupcake liners or silicone molds in a muffin tin for structure and support.
- In a large microwave-safe bowl, combine the white chocolate chips and butter. Microwave in 30-second intervals, stirring between each interval, until completely smooth and melted. This usually takes about 90 seconds total.
- Divide the melted chocolate into four smaller bowls if you want multiple pastel colors. Add a small drop of food coloring to each bowl and stir gently until the color is evenly distributed throughout the chocolate.
- Stir in the Rice Krispies cereal and mini marshmallows into each colored bowl of chocolate. Mix until every piece is fully coated and glistening with that beautiful pastel hue.
- Spoon the mixture into your prepared cupcake liners, pressing gently to create a slight nest shape or flat disk depending on your preference. Do not overfill. Leave room for toppings.
- Immediately press three to five mini candy-coated chocolate eggs into the top of each cup while the chocolate is still warm and pliable.
- Sprinkle Easter-themed sprinkles or edible glitter over the top for extra festive sparkle and visual appeal.
- If using shredded coconut grass, sprinkle a small amount around the candy eggs for an adorable nest look that will delight kids and adults alike.
- Transfer the muffin tin to the refrigerator and allow everything to set for at least 15 minutes until firm and fully hardened before serving.
Practical Tip: If your chocolate starts to thicken before you finish assembling, microwave it again for 15 seconds and stir. Working quickly is the key to getting smooth, beautiful results every single time.
These are also one of the most popular easy easter dessert recipes trending this spring season according to food enthusiasts everywhere online.
Why It Is a Great Quick Meal for Holiday Celebrations
This recipe ticks every box for a stress-free Easter celebration. It requires zero baking, uses ingredients available at any grocery store, and takes less time than an episode of your favorite show. The colorful pastel palette naturally fits the season, making these treats look professionally crafted even when made by a complete beginner. They are also endlessly customizable so every batch can feel unique and personal. Best of all, the combination of creamy chocolate, airy marshmallows, and crispy cereal creates a texture contrast that is genuinely addictive and crowd-pleasing for all ages.
Pro Tips from the Kitchen
- Use high-quality white chocolate or melting wafers for the smoothest, most glossy finish possible.
- Do not add too much food coloring at once. Start with one drop and build slowly to achieve soft, pastel tones.
- Chill your mixing bowls briefly before adding cereal to prevent the chocolate from setting too fast during mixing.
- Always work in a cool kitchen environment to give yourself maximum time before the chocolate begins to firm up on you.
- Use a cookie scoop for perfectly portioned and evenly sized treats every single time without the mess.
Tips, Variations, and Shortcuts
This recipe is incredibly flexible and welcomes creative experimentation with flavors, colors, and dietary needs.
- Vegan Version: Use dairy-free chocolate chips, vegan butter, and plant-based marshmallows to create a fully vegan-friendly treat everyone can enjoy.
- Peanut Butter Twist: Stir two tablespoons of creamy peanut butter into the melted chocolate before adding cereal for a rich and nutty flavor profile.
- Chocolate Egg Nest Variation: Shape the mixture into bowl forms instead of flat disks and create a realistic bird nest look using extra shredded coconut dyed green.
- Batch Cooking: Double or triple the recipe easily for large gatherings, Easter egg hunts, or classroom parties and celebrations.
- Freezing Tip: These treats freeze beautifully for up to one month. Layer them between sheets of parchment paper in an airtight container for best results.
- Shortcut: Use pre-colored candy melts available at craft stores to skip the food coloring step entirely and save even more precious time.
Common Mistakes to Avoid

- Overheating the chocolate: Chocolate burns easily in the microwave. Always use short 30-second intervals and stir thoroughly between each one to avoid scorching.
- Adding too much food coloring: Liquid food coloring can cause chocolate to seize and become grainy. Use gel-based food coloring for the best and most reliable results.
- Not working quickly enough: Once chocolate starts to set, it becomes difficult to mix and shape. Have all your ingredients pre-measured and ready before you begin melting.
- Skipping parchment paper: Without parchment, treats will stick to surfaces and break apart when removed. Always line your baking surfaces properly before starting.
- Adding cereal too early: If the chocolate is still extremely hot when you add cereal, it can become soggy. Let the chocolate cool for about 60 seconds before folding in the cereal and marshmallows.
Storage and Reheating Tips
- Store finished treats in an airtight container at room temperature for up to three days in a cool, dry place away from direct sunlight.
- For longer storage, refrigerate in a sealed container for up to one week. Bring to room temperature before serving for the best texture and flavor.
- To freeze, wrap individual pieces in plastic wrap and store in a freezer-safe bag or container for up to four weeks without quality loss.
- These treats do not require reheating and are best served at room temperature or slightly chilled for that satisfying snap of chocolate.
Nutrition Information
The following values are approximate per serving based on one treat from a batch of twelve pieces.
- Calories: 185 kcal
- Protein: 2g
- Carbohydrates: 24g
- Fat: 9g
- Fiber: 0.5g
- Sugar: 18g
- Sodium: 55mg
- Calcium: 4% Daily Value
- Iron: 2% Daily Value
Values will vary based on specific brands used, portion sizes, and any ingredient substitutions you choose to incorporate into your version of this recipe.
Conclusion
There is honestly no better way to celebrate the season than by making these adorable, delicious, and totally effortless easter sweet treats for everyone you love. From the pastel colors to the satisfying crunch and creamy chocolate coating, every element of this recipe is designed to bring smiles and holiday joy without any stress. Whether you are a seasoned baker or a complete beginner stepping into the kitchen for the first time, this recipe will make you look and feel like a true dessert artist. We would love for you to explore more easy easter dessert recipes on our blog and discover even more ways to make your Easter celebration unforgettable. Now grab your chocolate, gather the family, and start creating something truly sweet and special today.
Frequently Asked Questions
Can I make these easter treats a day ahead of time?
Absolutely! These treats actually benefit from being made one day in advance because the chocolate sets more firmly overnight in the refrigerator. Store them in an airtight container and they will be perfectly ready to serve the next day with zero prep needed.
What can I use instead of candy-coated chocolate eggs?
If you cannot find mini Easter eggs, you can use jelly beans, gummy worms, colorful M&Ms, or any small candy that fits the festive spring theme. The important thing is that the topping is colorful and fun for your presentation.
Are these treats safe for kids with nut allergies?
The base recipe is nut-free, but always check the labels on your specific chocolate chips and candy toppings for potential cross-contamination warnings. If you add the optional peanut butter, keep nut-free and peanut butter versions clearly separated and labeled.
Can I use dark chocolate instead of white chocolate?
Yes, dark or milk chocolate works wonderfully in this recipe. Keep in mind that food coloring will not show up on dark chocolate, so you would skip the pastel coloring step and focus on decorations and toppings for the festive Easter look instead.
How far in advance can I freeze these treats?
You can freeze these Easter sweet treats up to four weeks before the holiday. Simply wrap each piece individually in plastic wrap and store them in a freezer-safe container. Thaw overnight in the refrigerator or for about one hour at room temperature before serving.